As of a few months ago I used DynDNS as my provider when it came to attaching a hostname to my dynamic IP address that every now and then changed. For a while they have been cutting down their free services. I wanted to eliminate the middle man as they were only offering their choice of domains.
The goal was to use only my own domain/hostname and not rely on some service that seemed it would go away any day now. Amazon’s Route 53 was the obvious choice for me. Amazon isn’t going anywhere and I’m already using other parts of Amazon’s web services. It isn’t free, but you also get more freedom to do things. Plus there’s a lot of development happening around AWS.
Please note that my way of doing this requires PHP.
Starting things
The first step is of course to have a domain name that you’d like to use for your dynamic DNS adventures. I usually register my domains at Hover.com. They have a nice and easy to use web interface, no clutter and aren’t trying to upsell you on services you don’t want. That said, Amazon also offers domain registration services.
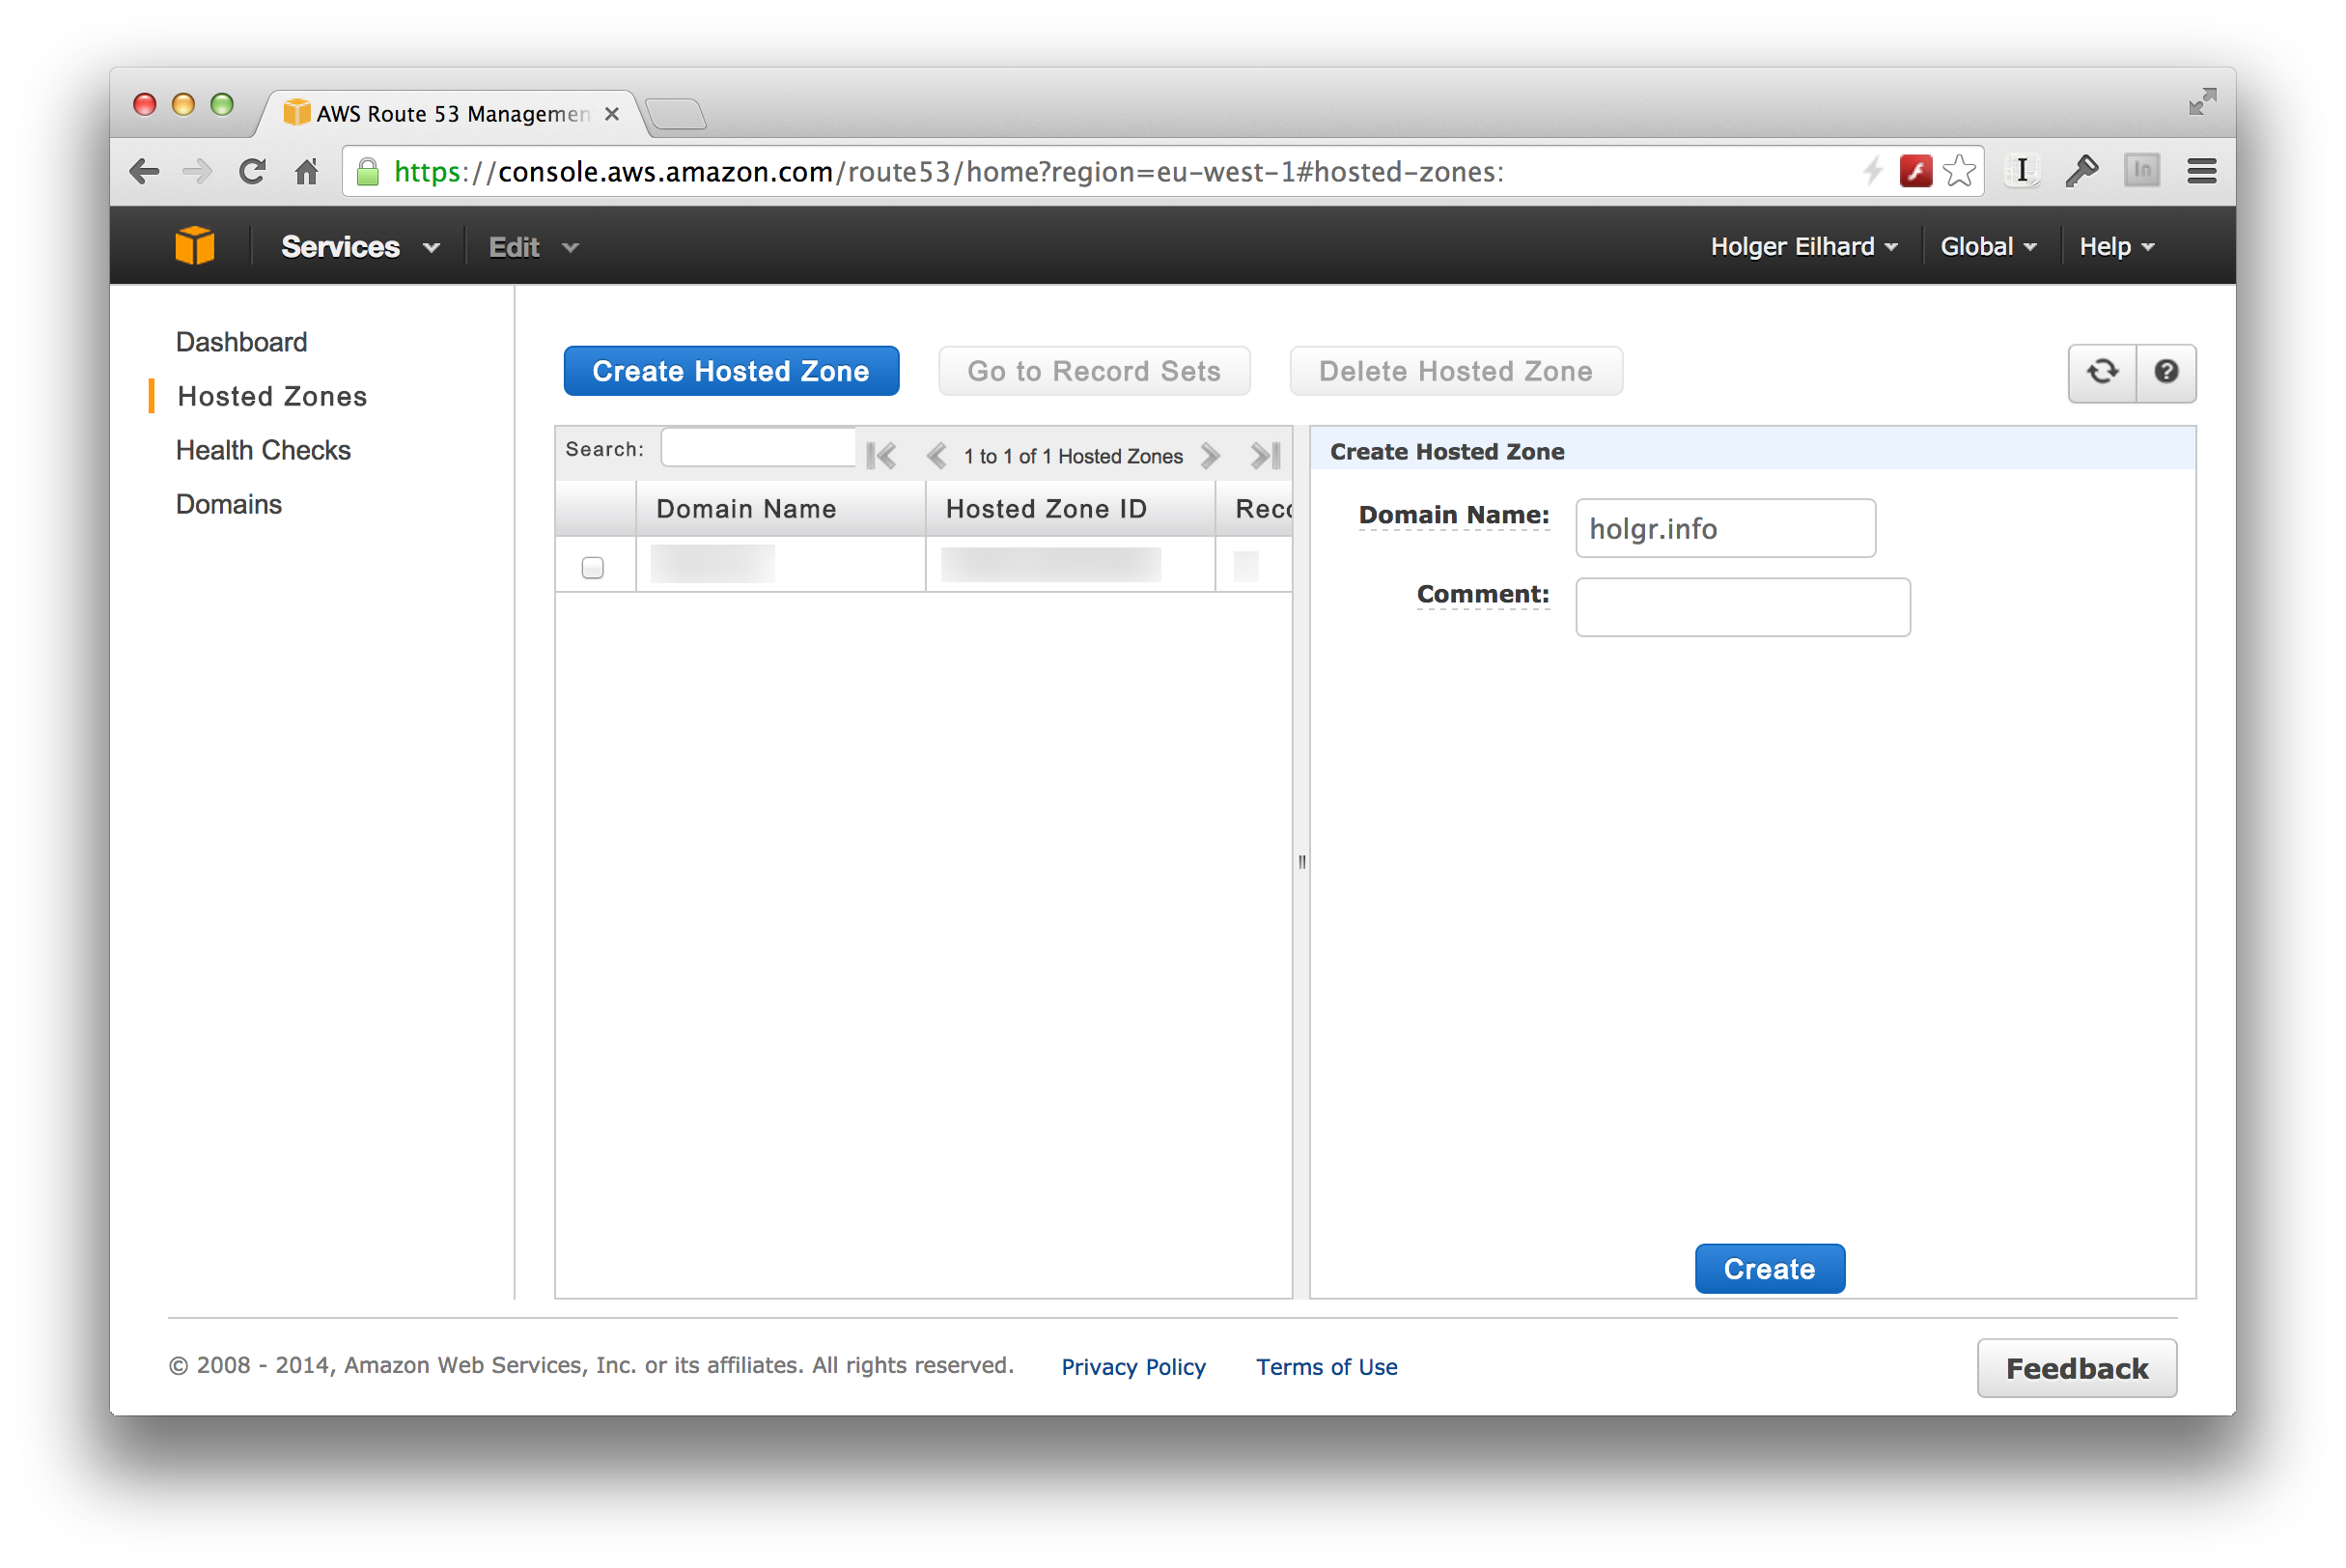
After registering your domain you’ll have to create a Hosted Zone for that domain on AWS. I’m using holgr.info in this example.
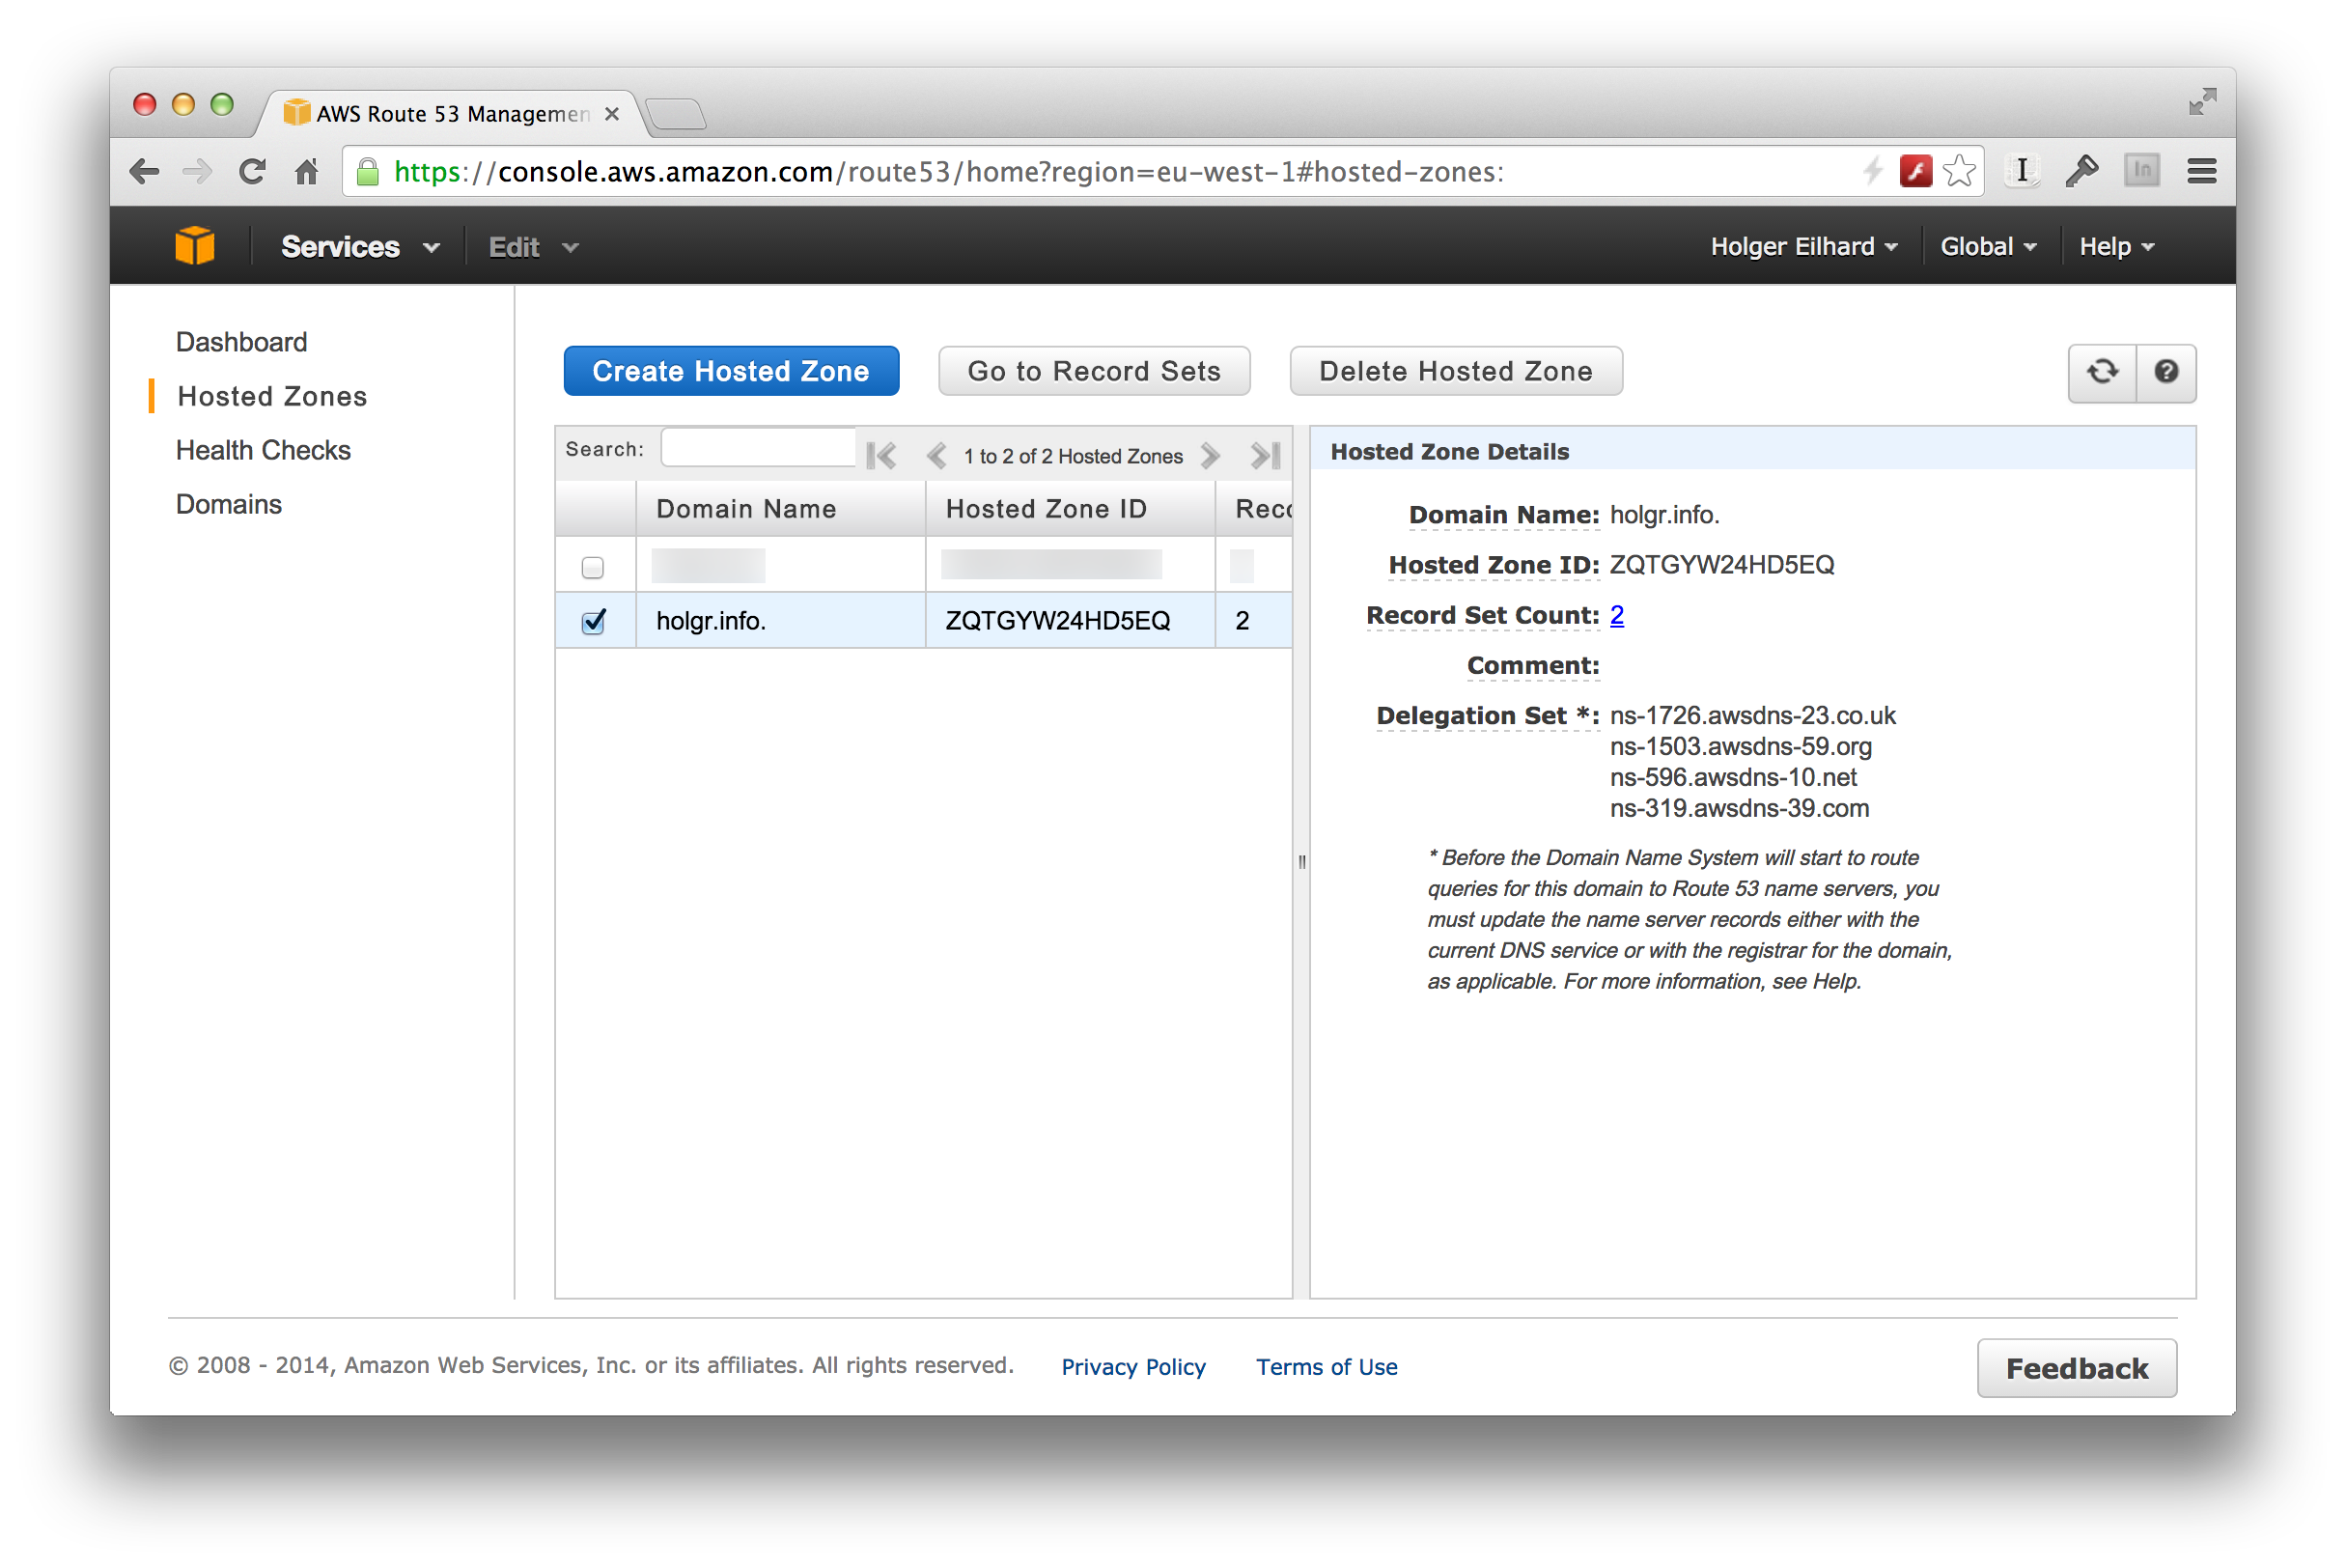
Once that’s done you’ll get a list of name servers that you’ll need for your registrar, in my case Hover. I had to change the name servers on Hover’s web interface to those that Amazon gave me for Route 53. Also note the Hosted Zone ID, which is a string of letters and numbers.
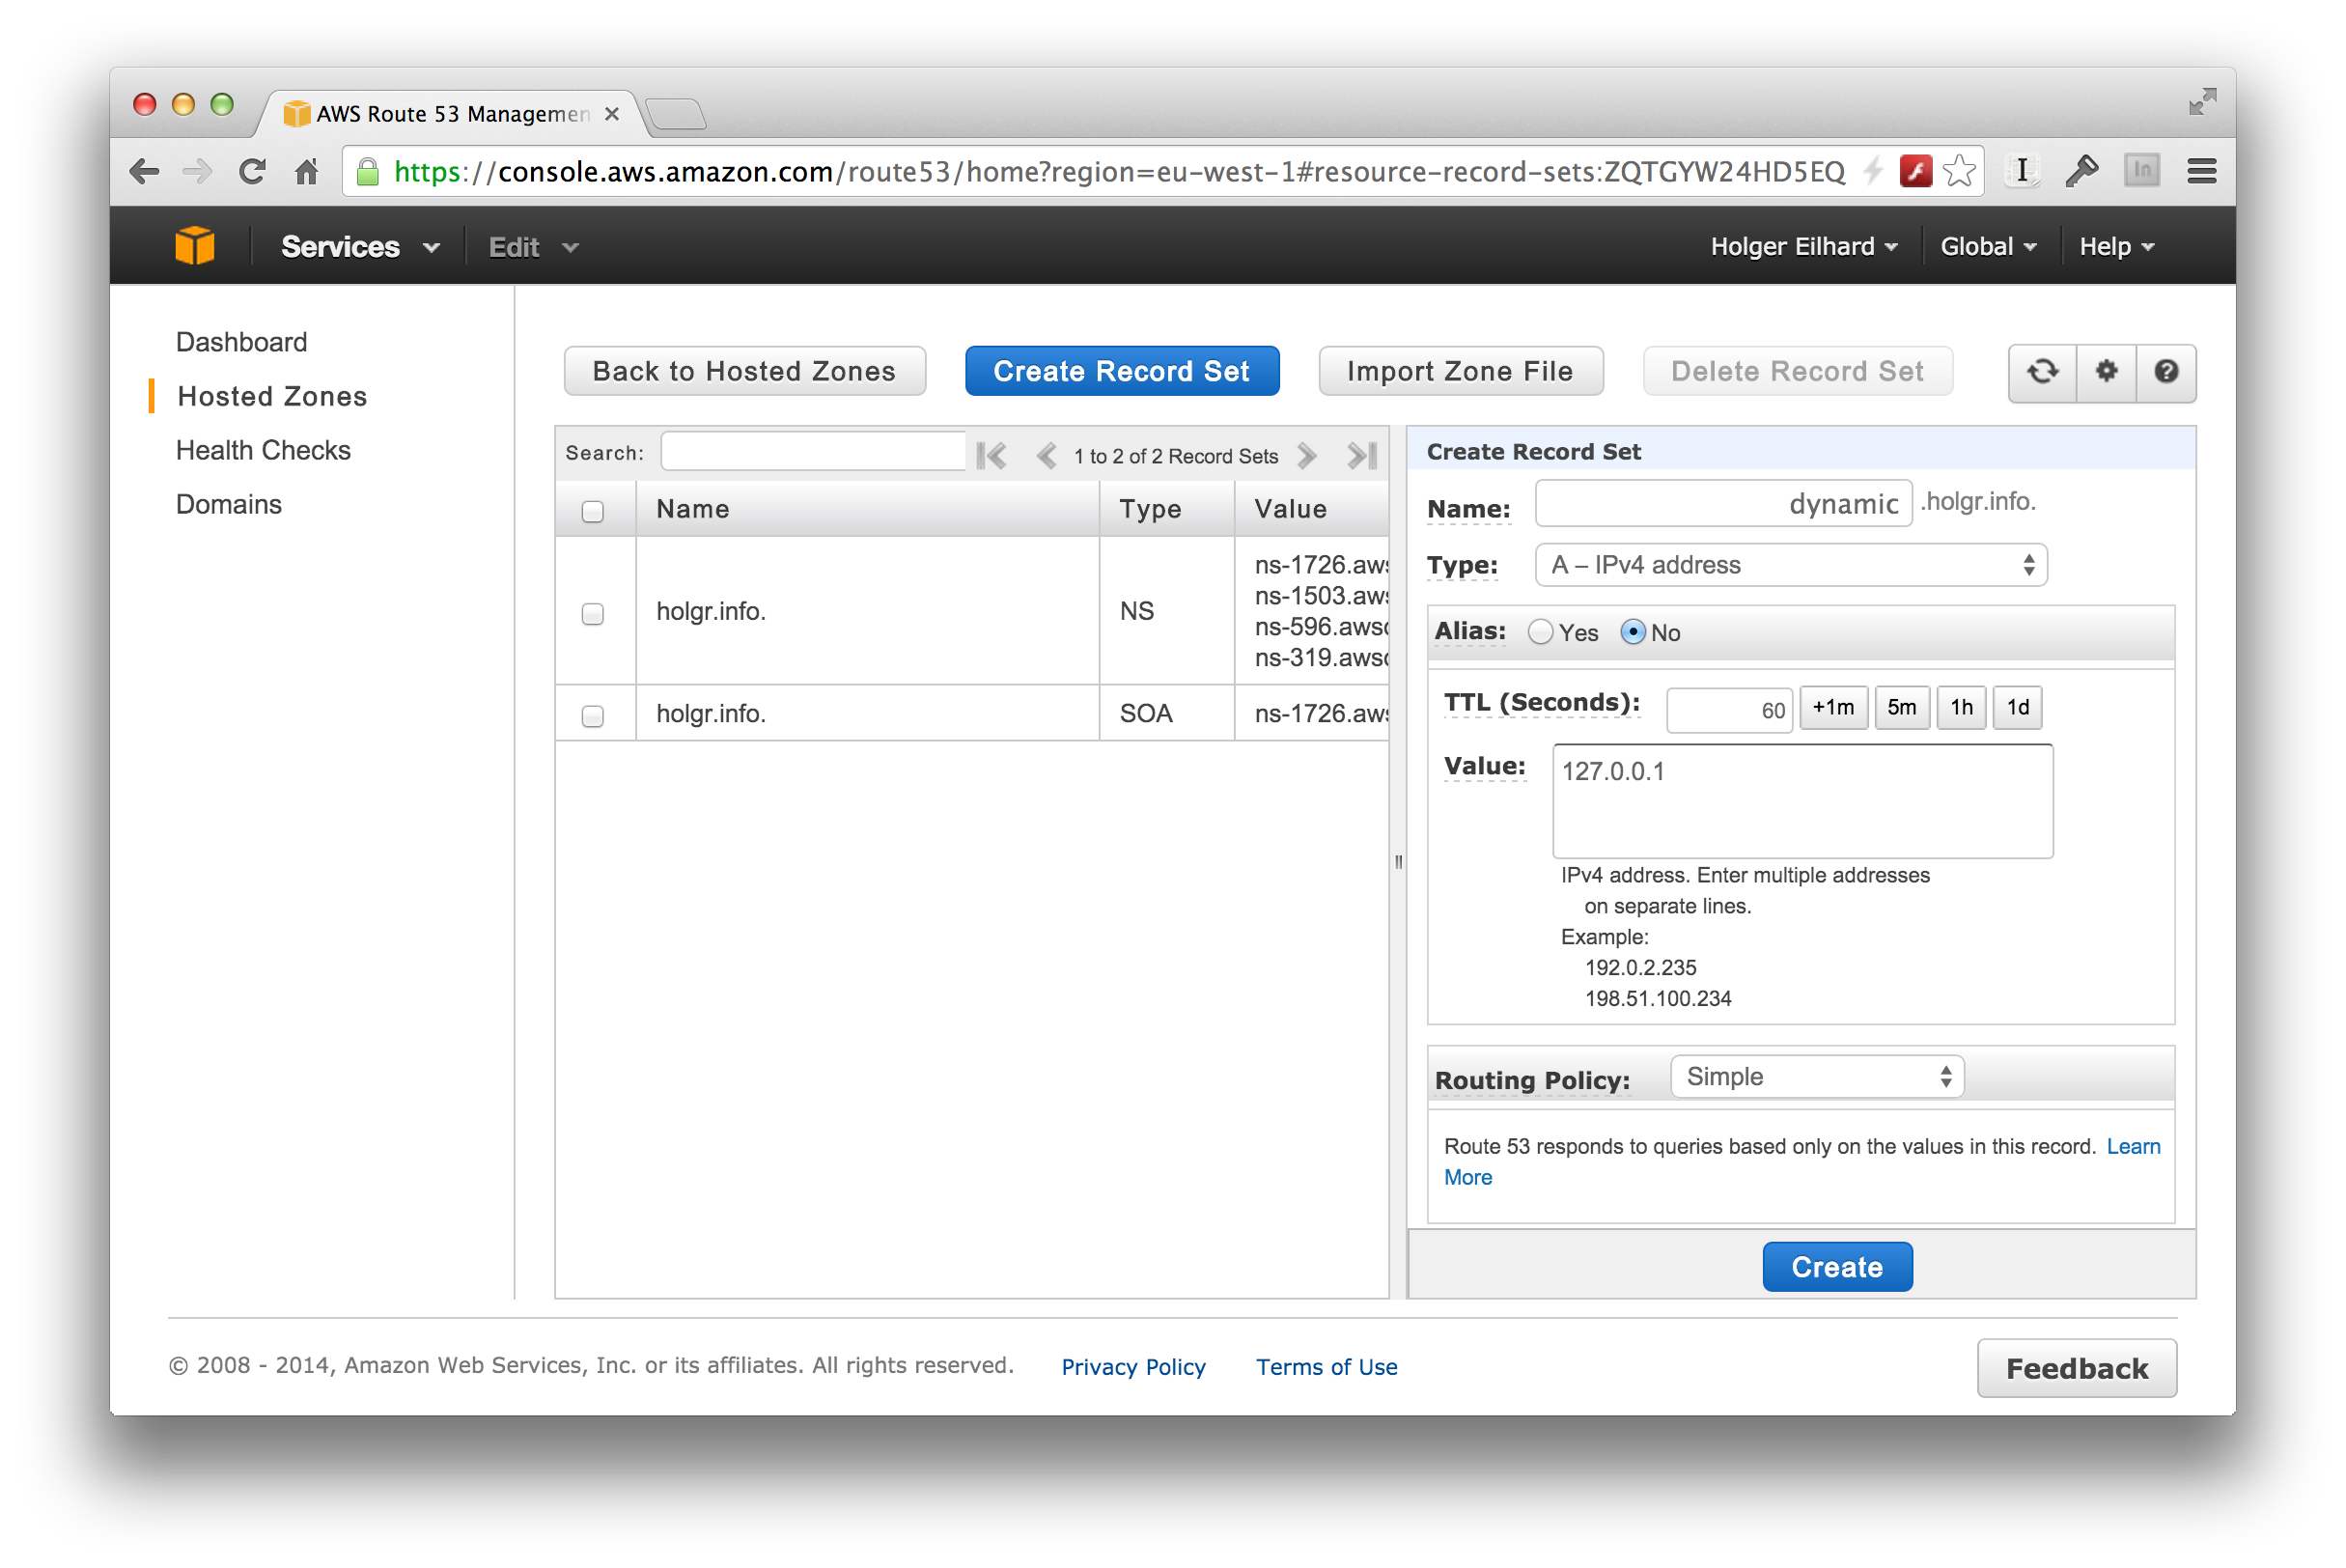
When you’re finished with that, the domain will effectively be managed through Route 53 which means you can add the hostname – on Route 53 it’s part of creating a record set – you’d like to use for your dynamic DNS service. In my case I used dynamic.holgr.info. It also requires you to enter an IP address. I just went ahead with 127.0.0.1. I also changed the TTL to 1 minute.
You’ll need the hostname for the update script along with the Hosted Zone ID from earlier.
Using the script
I’ve published my hack of a script on Github. Note that it requires PHP on your command line, if you’re using Linux it’s usually called php-cli or something like that. OS X ships with it by default. It also relies on Dan Myers’s Amazon Route 53 PHP Class.
Once your done downloading you should have three PHP files in the same directory: ddns53.php, IncR53.php and r53.php. As of right now, you’ll have to modify IncR53.php and ddns53.php. If I find the time I’ll make it so that only one of the files needs modifications.
IncR53.php requires your Amazon Access key ID and Secret access key.
ddns53.php has a number of things that need to be adjusted to your own settings. First you’ll have to replace YOUR-HOSTNAME with the hostname you created, in this example dynamic.holgr.info. Then there are a number of occurences of YOUR-HOSTED-ZONE-ID which have to be replaced by your Zone ID.
Once that’s done you should be able to just run “php ddns53.php” and it’ll update the IP of your host.
Automating the script
In my case I use the script on my RaspberryPi so that it runs at boot time and every ten minutes. I use my cron to do this. Start editing your user’s crontab (crontab -e) and add these two lines:
    @reboot /usr/bin/php PATH-TO-YOUR/ddns53.php
    0,10,20,30,40,50 * * * * /usr/bin/php PATH-TO-YOUR/ddns53.php
Let me know if you have any questions about this simple Howto. Again, the script could use a bit of cleaning up. It was all done within an hour or two.