 Looking at yesterdays download speeds of the Lion developer seed, I guess many people were trying to get their hands on it. Now that most of you might finally have finished the download, the next step is to install 10.7. Some of you do not want to use the installer but rather have a DVD (or USB stick) to do a clean install. The way to get that DVD/USB stick is rather simple but not quite obvious.
Note: I haven’t gone through a whole installation via DVD yet, only so far to get to the installer where it asks me on which drive I want to install the preview.
Note 2: This tutorial only applies to the official preview release that developers downloaded through the App Store. If you got your files from somewhere else, I cannot help you.
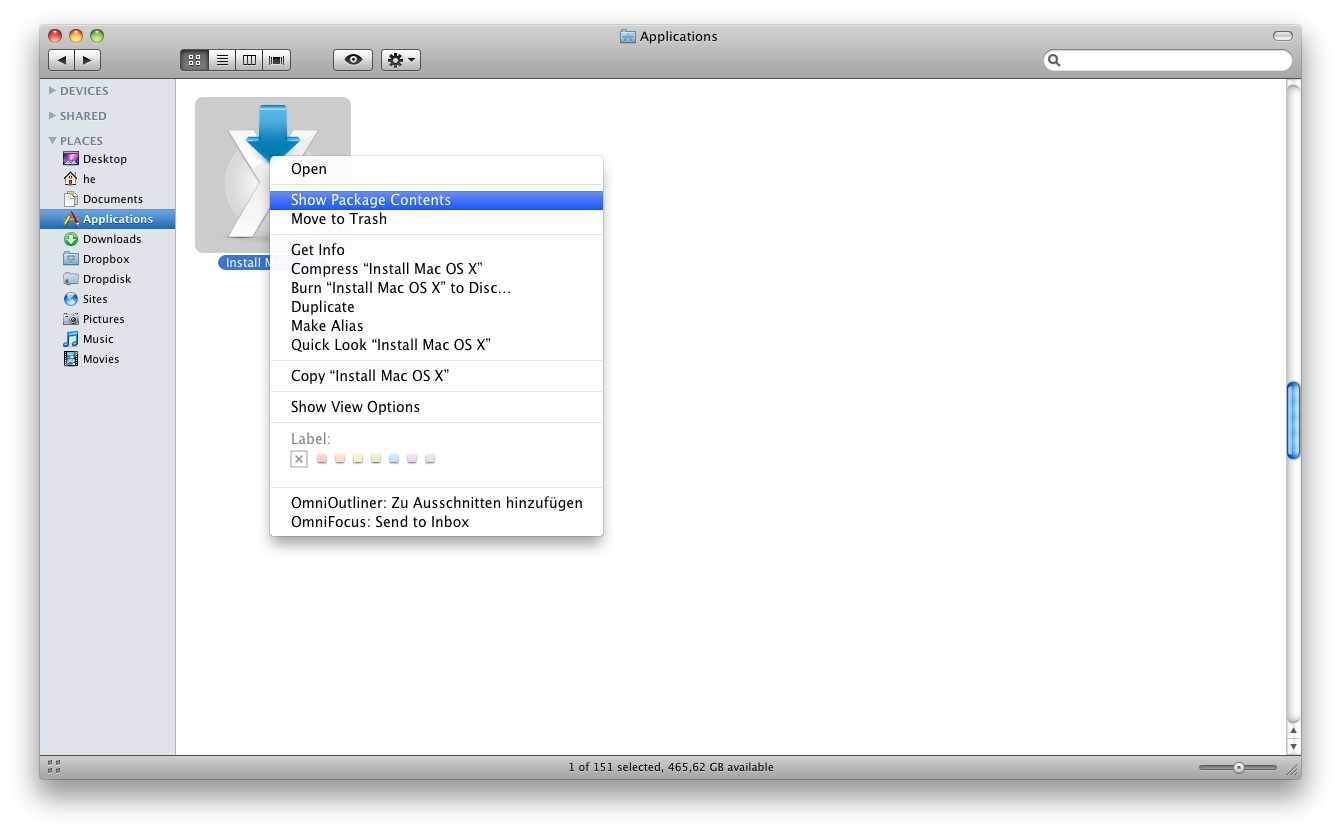
First: Go to the downloaded “Install Mac OS X” app that you downloaded via the Mac App Store, right click and select “Show Package Contents”.
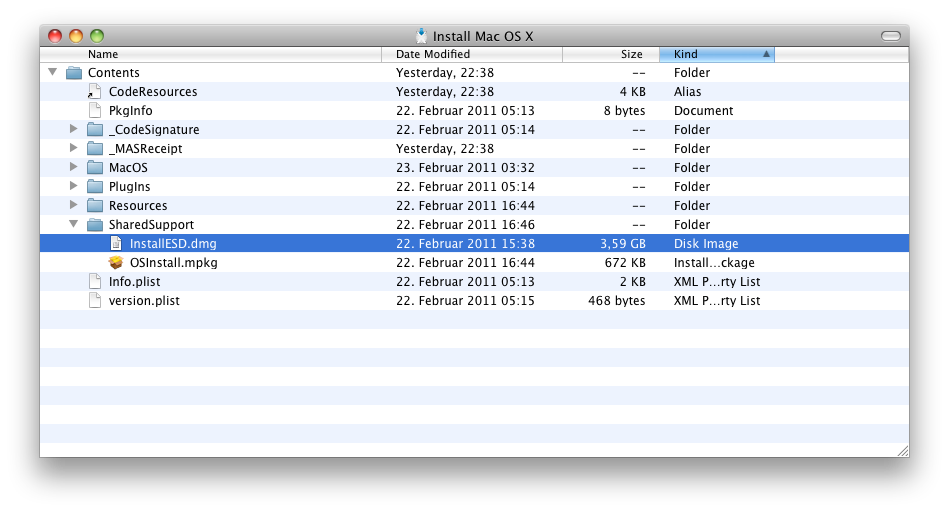
Next: Navigate to Contents -> SharedSupport. There you’ll find the .dmg file that you can burn to a DVD using Apple’s own Disk Utility.
The resulting disk is bootable and you should be able to do a clean install.
Note: It took ages to boot from the DVD in my case. Be patient here!
Update: The USB stick Here’s how you create an USB dongle version.
I tried this and it did work (and was – as expected – much quicker to boot/install than the DVD). Be aware to double – okay, make it triple – check that you select the correct devices during the process.
Warning: I’m not taking responsibility if you format your harddrive and lose important data. Make a backup first!
First: Get an empty USB stick with more than 4 GBytes of capacity. (Mine had 8 GB.) Start Disk Utility, erase and format the USB stick. I used “Mac OS X Extended” format, but “Mac OS X Extended (Journaled)” should work as well.
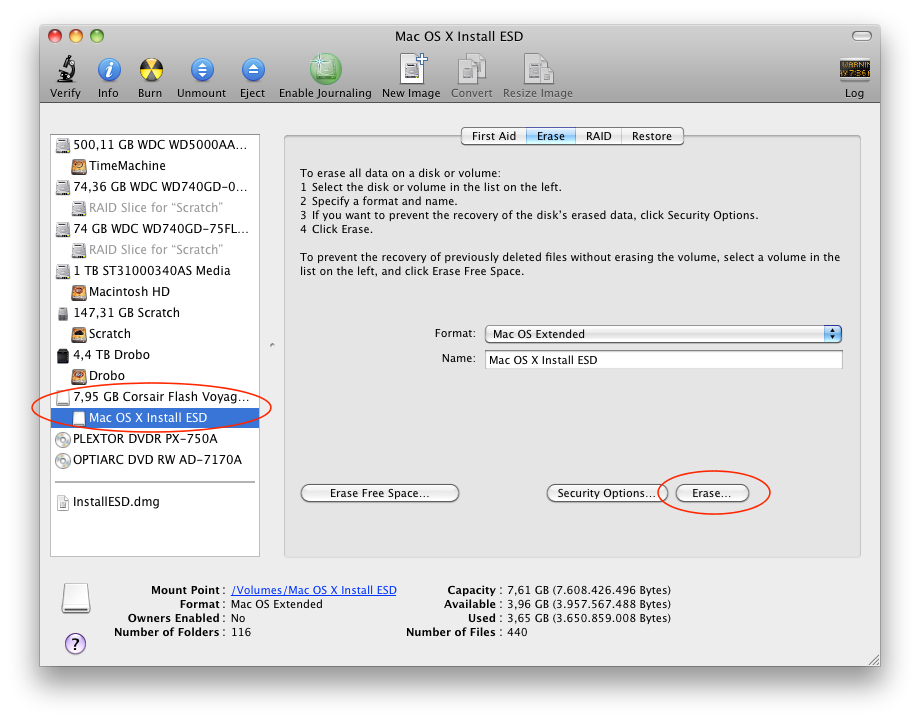
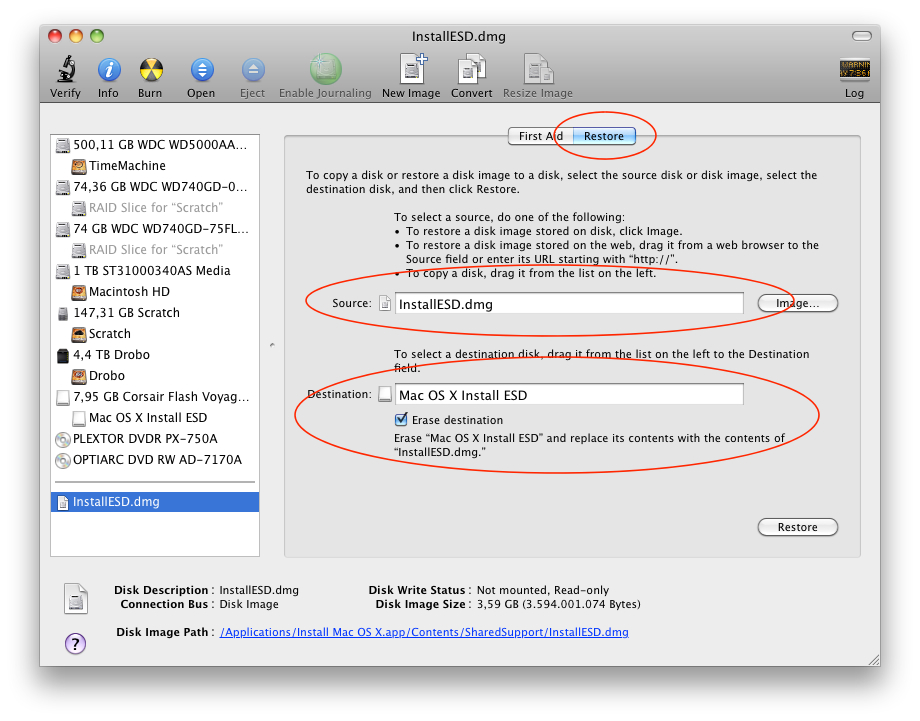
Next: Go to the Finder and drag InstallESD.dmg from there into the left hand pane of Disk Utility, then select it, go to Restore and drag the InstallESD.dmg into the Source field and your USB stick into the Destitination field. Click on “Restore” to start the process. It took about 10-15 minutes in the case of my USB stick, but you’ll see a nice progessbar during the process. When it’s finished, you should see the USB stick mounted on your desktop and the installation files in it.
After all that’s done reboot your Mac and press+hold the Alt key after the startup sound. Keep it pressed until you see the bootmenu and select the USB drive to boot from. That’s it, you can install 10.7 now. The USB part was inspired by Maciverse’s guide.
Let me know if this process worked for you (especially the DVD part) or if there were any hiccups during the actual installation. Update: This method still works as described with the Lion GM.